
.png)
What's in the box
- Decision Light and Down Signal Lightbox
- 3x Referee Controllers
- Central Control Unit
- Hard Storage Case
- 2x Power Cables
- 1x USB A to USB C Cable
- 3x Referee Controllers
- Central Control Unit
- Hard Storage Case
- 2x Power Cables
- 1x USB A to USB C Cable
What's in the box
- Decision Light and Down Signal Lightbox
- 3x Referee Controllers
- Central Control Unit
- Hard Storage Case
- 2x Power Cables
- 1x USB A to USB C Cable
- 3x Referee Controllers
- Central Control Unit
- Hard Storage Case
- 2x Power Cables
- 1x USB A to USB C Cable
Powering the Devices
.gif)
1
Connect the Power Adapter
Connect the power adapter by joining the wall plug to the connector that plugs into the device. Complete this step for the second included power cable as well.
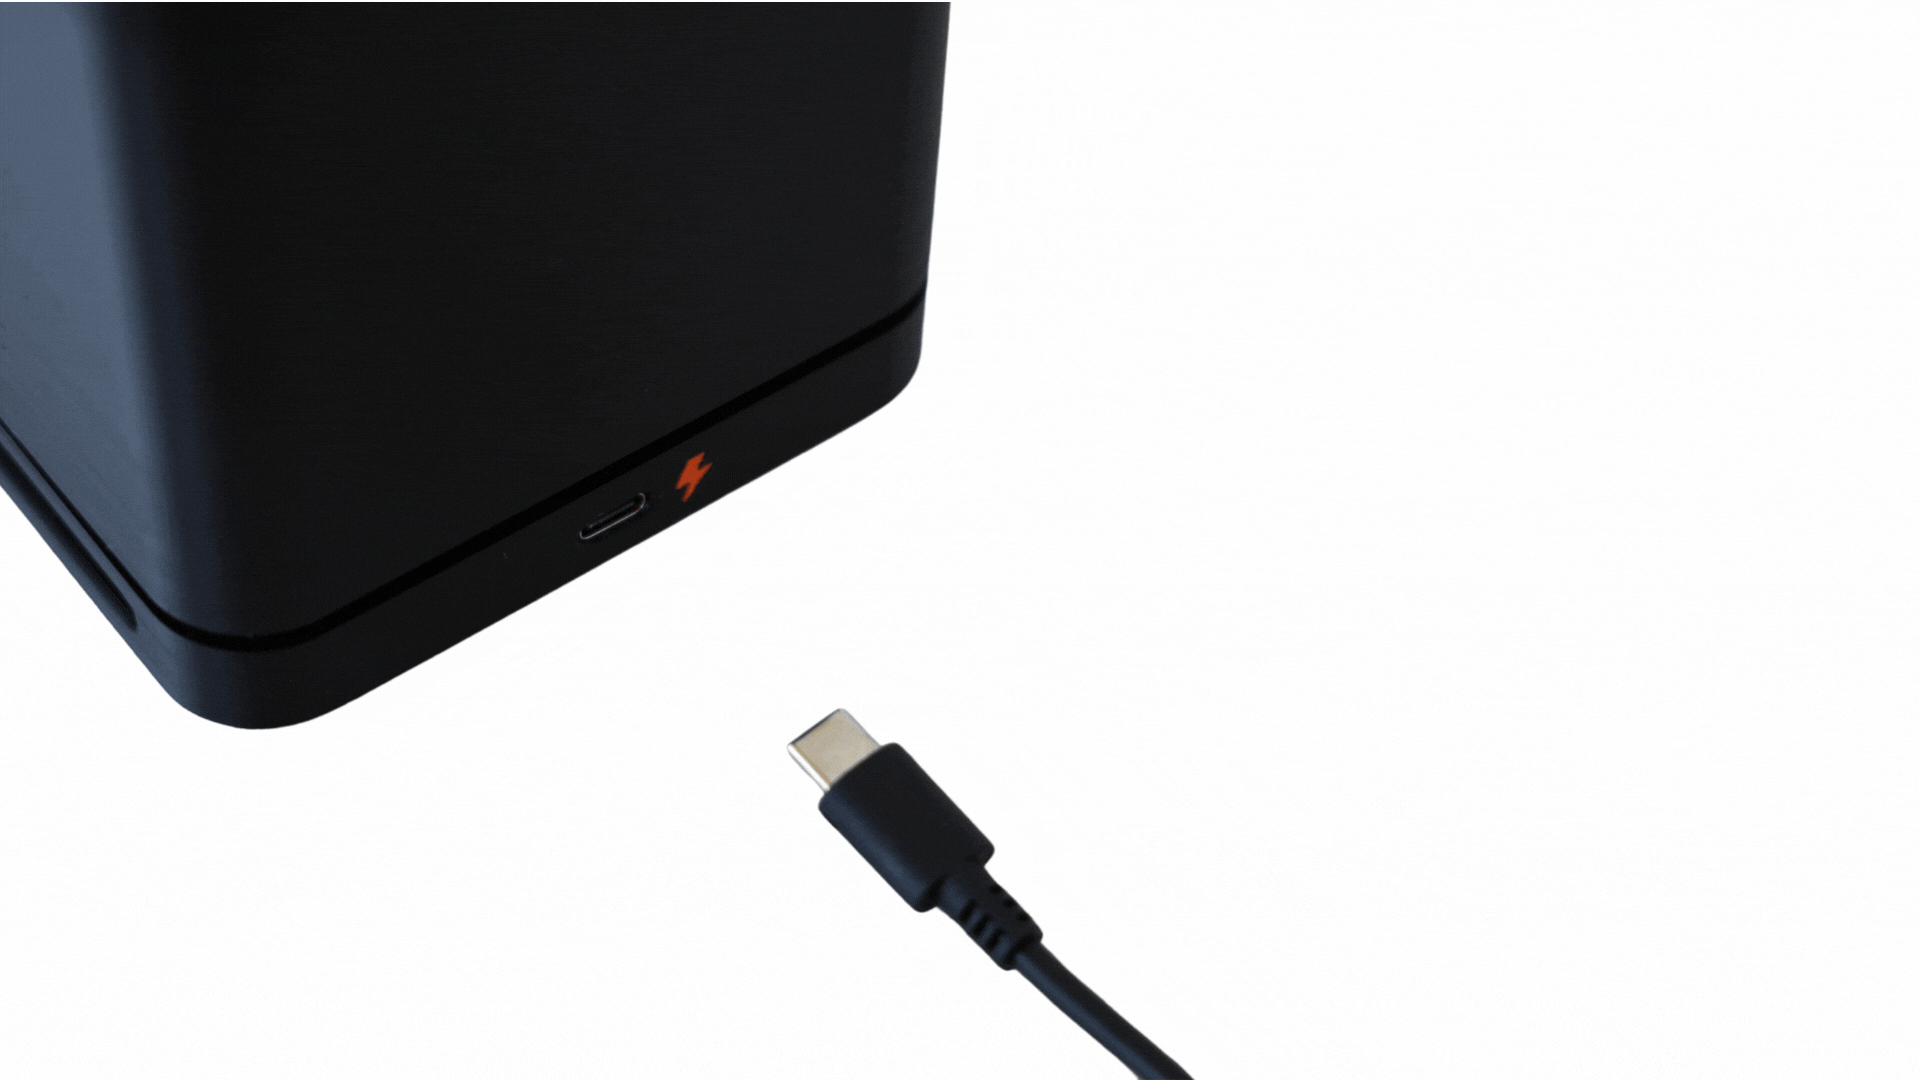
2
Power the Devices
Plug both of the power cables into an outlet. (If you are using the livestreaming feature, ensure this unit is positioned near a laptop with internet access). Plug one the USB-C connectors into the Central Control Unit and the other into the Decision Lightbox.
.jpg)
3
Position the Lightbox
Place the lightbox so the RepLogic logo is upright and facing the referees. This ensures each decision light corresponds to the correct referee.
Setting Up The Referee Controllers
.png)
1
Power On the Controller
Switch on one of the referee controllers using the power switch located at the top. You will see 1, 2, or 3 on the OLED screen —this shows which referee position the controller is currently assigned to:
1 = Left Referee
2 = Center Referee
3 = Right Referee
1 = Left Referee
2 = Center Referee
3 = Right Referee
.png)
2
Set the Referee Number
Press the white button (left) to cycle through referee numbers.
Press the red button (right) to confirm your selection.
Note: This selection mode will time out after 15 seconds. To re-enter selection mode, simply turn the controller off and on again.
Repeat the above steps for the other two referee controllers, ensuring each one is assigned a unique referee number (1, 2, or 3).
.png)
3
Check Wireless Connection
If a controller is not connected, the WiFi and Server indicators will have a cross through them. If there are no crosses through the WiFi and Server indicators then all devices are properly connected and ready for use.
Standalone Mode
Standalone Mode allows the RLSX2 System to operate independently without the need for external software. This mode is ideal for events using alternative competition management systems or for those seeking a simple, self-contained solution for referee decision lights, timing, and jury control. It offers flexibility and reliability without relying on third-party integrations.
.png)
Set The Mode
Once you have completed the setup process, ensure the mode switch on the central control unit is set to “S”.
This will then set the OWLCMS status on the Central Control Unit display to “OFF”.
Standalone mode is now ready to use. Ensure you do one test decision to ensure everything has been set up correctly and is working as normal.
This will then set the OWLCMS status on the Central Control Unit display to “OFF”.
Standalone mode is now ready to use. Ensure you do one test decision to ensure everything has been set up correctly and is working as normal.
Integrated Mode
Integrated Mode allows the system to sync with OWLCMS, enabling automatic communication between theRLSX2 referee devices and the central competition software. In this mode, referee decisions, timing signals, and jury overrides are seamlessly transmitted to OWLCMS, ensuring real-time updates to scoreboards, livestream overlays, and event displays.
.png)
1
Set The Mode
Once you have completed the setup process, ensure the mode switch on the central control unit is set to “I”.
This will then set the OWLCMS status on the Central Control Unit display to “OK”.
This will then set the OWLCMS status on the Central Control Unit display to “OK”.
.png)
2
Connect to the WiFi
On your computer/laptop, connect to the RLSX2 WiFi using the details in your included manual. Once your device has connected, open your web browser and navigate to replogic.local:8080.
.png)
3
Configure Competition
Replogic.local:8080 will open the OWLCMS page in your web browser. Load your entry list, weigh in athletes and then you are ready to go. No additional set up for the light system is required.
Copyright © RepLogic Systems Pty Ltd 2025